


how to edit photos faster in Lightroom ? If you want to edit photos faster in Lightroom, you need a structured workflow. Professional photographers often return from a shoot with hundreds — sometimes thousands — of images waiting to be processed.
Learning how to edit photos faster in Lightroom is one of the most valuable skills you can develop. It lets you deliver client work quicker, maintain consistent quality, and free up time for shooting.
In this guide, you will learn the exact professional Lightroom workflow used by photographers who edit large batches of images efficiently without sacrificing results.

Why Editing Speed Matters for Photographers
Many photographers underestimate how much time editing actually takes.
Consider these real-world numbers:
- A wedding photographer may shoot 1,500–3,000 images per event
- A portrait session typically produces 200–400 selects
- An event photographer may deliver hundreds of finished images per job
Without an efficient system, editing can consume more time than the shoot itself. Mastering how to edit photos faster in Lightroom directly impacts your income, client satisfaction, and work-life balance.
According to Adobe’s official Lightroom workflow guide, a structured import-to-export process is the foundation of any fast, professional editing system.
Step 1: Import and Organize Before You Edit
The fastest way to edit photos in Lightroom starts before you touch a single slider.
When importing your images, follow these steps:
- Import all RAW files into a dedicated folder
- Create a Collection for each shoot or client
- Enable automatic file renaming on import
- Add keywords and metadata during the import process
Organizing your images properly at this stage eliminates wasted time searching for files later — and makes batch editing far more efficient.
Step 2: Cull Your Photos First
One of the biggest time-wasters in photo editing is processing images that should have been deleted.
Professional photographers use a culling workflow before editing begins:
- Flag your best images with P (Pick)
- Reject unusable shots with X (Reject)
- Delete all rejected images before starting edits
Look for sharp focus, strong composition, good expressions, and proper exposure. Culling aggressively means you only edit your best work — which is exactly how professionals edit photos faster in Lightroom.
Step 3: Use Lightroom Presets to Apply Edits Instantly
Using Lightroom presets is the single most effective way to speed up your editing workflow.
Instead of manually adjusting every slider on every photo, a preset applies a complete, professional-grade color grade in a single click.
Benefits of using presets to edit photos faster in Lightroom:
- Apply consistent color grading across an entire shoot instantly
- Reduce per-image editing time from minutes to seconds
- Maintain a signature style across all your work
- Experiment with multiple looks before committing
Professional preset collections like those available at Camegraphy are tested across different camera brands, lighting conditions, and skin tones — so they work reliably right out of the box.
The most reliable shortcut to edit photos faster in Lightroom is starting with a quality preset — it eliminates 80% of the manual work instantly.
Step 4: Use Batch Editing in Lightroom
Batch editing in Lightroom is the technique that separates slow editors from fast ones.
Instead of editing each photo one by one, you edit a single hero image and copy those settings across your entire selection.
How to use batch editing in Lightroom:
- Edit your best photo from a shoot
- Select all similar photos in the filmstrip
- Click Sync Settings (or use Auto Sync)
- Choose which settings to sync across all images
This technique alone can reduce editing time on a large shoot by 70–80%. It’s especially powerful for weddings, events, and portrait sessions where many photos share similar lighting conditions.
Step 5: Use Auto Sync for Live Batch Editing
Auto Sync takes batch editing one step further.
When you enable Auto Sync in Lightroom, every adjustment you make applies to all selected images in real time. This means you can make exposure corrections, white balance tweaks, or preset adjustments and instantly see them applied across your entire selection.
Auto Sync is particularly effective for:
- Correcting white balance across a full event gallery
- Applying exposure adjustments when lighting changed during a shoot
- Fine-tuning skin tones across a portrait session
Mastering Auto Sync is one of the fastest ways to edit photos faster in Lightroom when you’re dealing with large galleries from weddings or events.
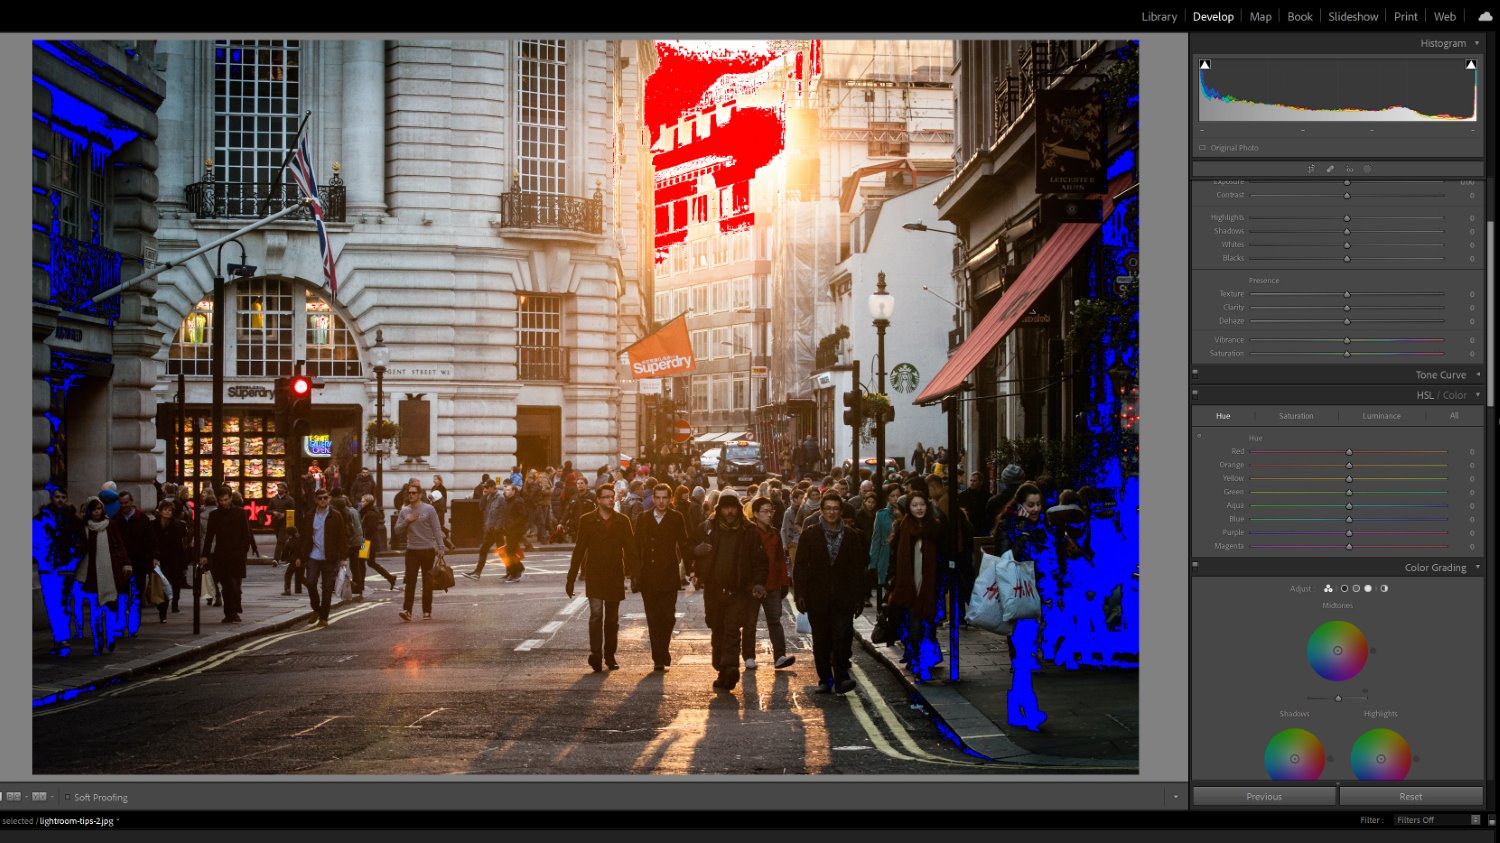
Step 6: Focus on the Essential Adjustments
When editing at speed, avoid the temptation to over-edit every detail.
Professional photographers who edit photos faster in Lightroom focus on the adjustments that matter most:
- Exposure — Get the brightness right first
- White Balance — Ensure accurate, flattering color temperature
- Highlights and Shadows — Recover detail in bright and dark areas
- Skin Tones — Use the HSL panel to refine only when needed
For most images processed with a quality preset, these minor tweaks are all that’s needed. Keeping adjustments simple is how professionals maintain speed without cutting corners on quality.
Keeping your adjustments focused and minimal is how professional photographers consistently edit photos faster in Lightroom without burning out.
Step 7: Export Your Photos Efficiently
Once editing is complete, use Lightroom’s batch export feature to export your entire gallery at once.
Recommended export settings for client delivery:
- Format: JPEG
- Quality: 90–95
- Color Space: sRGB
- Resolution: 300 DPI for print / 72 DPI for web
- Output Sharpening: Screen (for digital delivery)
Save your export settings as a preset inside Lightroom so you never have to configure them again.
The Professional Lightroom Workflow — Summary
Here is the complete workflow used by professional photographers to edit photos faster in Lightroom:
- Import and organize — Collections, keywords, folder structure
- Cull ruthlessly — Only edit your best images
- Apply a preset — Set your base color grade in one click
- Batch edit — Sync settings across similar images
- Fine-tune — Quick exposure, white balance, and tone adjustments
- Batch export — Deliver everything at once
Following this exact workflow on every shoot is how professionals handle large volumes of work without burnout.
Final Thoughts
Knowing how to edit photos faster in Lightroom is a skill that pays off on every single shoot. By combining smart organization, quality presets, and batch editing techniques, you can dramatically cut your editing time while maintaining — or even improving — the quality of your results.
If you want to speed up your workflow starting today, explore our professional Lightroom preset collections at Camegraphy — designed to help photographers edit faster, look more consistent, and deliver better results to every client.