


Save hours of editing with the right one-click actions — tested by professional photographers for skin retouching, frequency separation, cinematic looks, and more.
📅 Updated April 2026 ⏱ 10 min read 📸 By Camegraphy
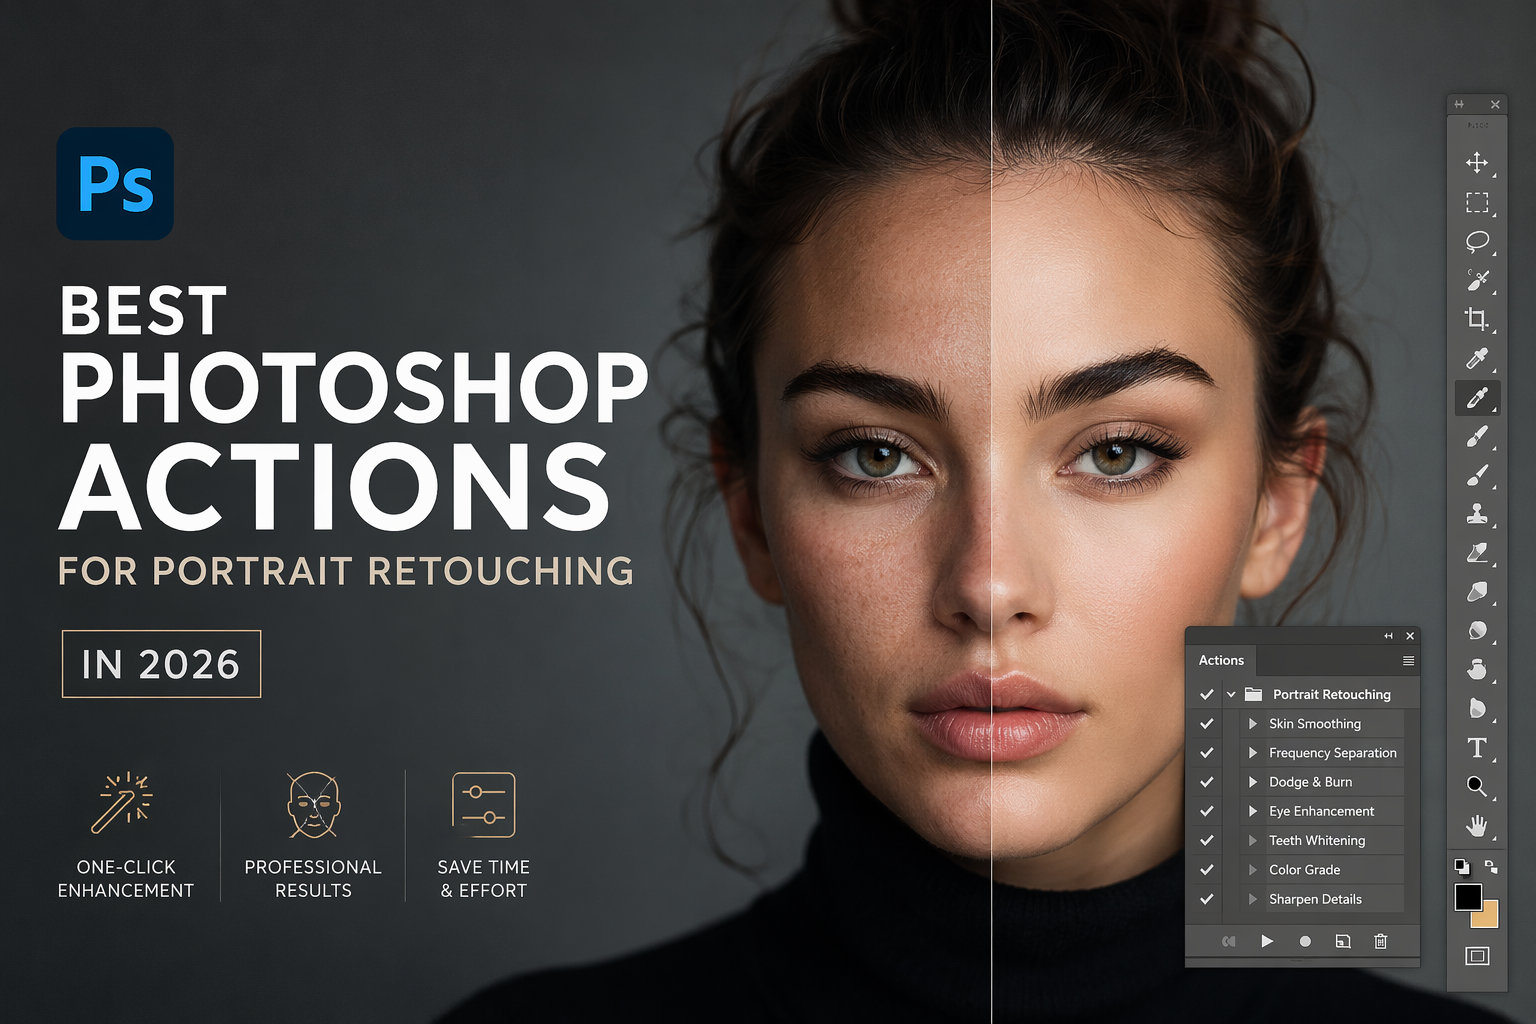
Best photoshop actions for portrait retouching
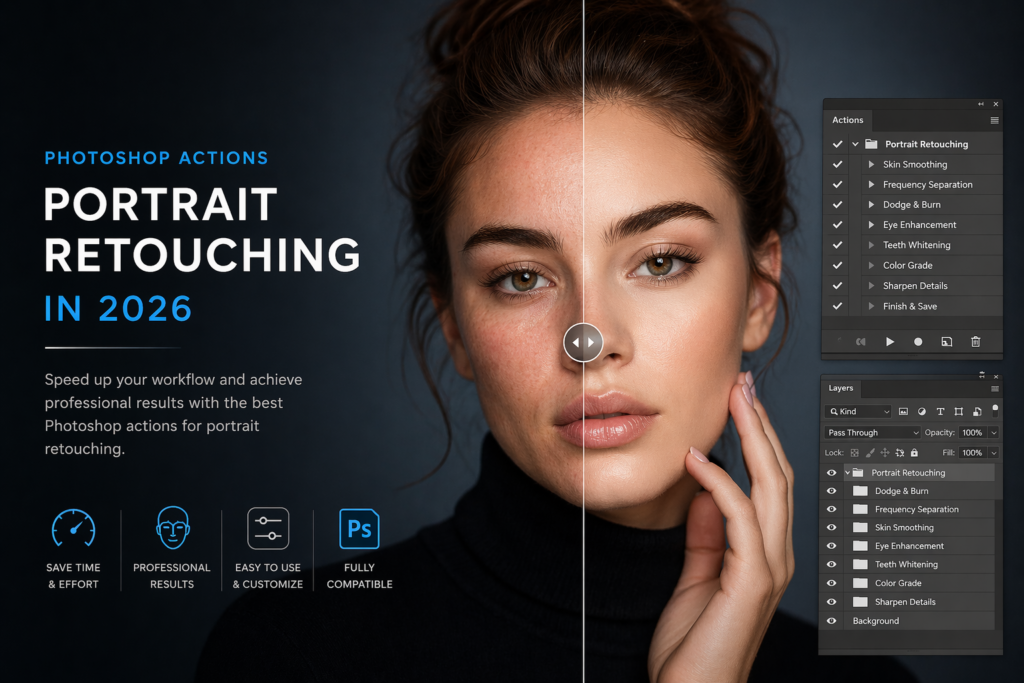
If you’re a portrait photographer still retouching skin manually — layer by layer, pixel by pixel — you’re leaving hours of your life on the table every single week. Photoshop Actions automate your most repetitive editing tasks, letting you achieve professional results in a fraction of the time.
In this guide, I’ve rounded up the best Photoshop actions for portrait retouching in 2026 — from frequency separation and skin softening to cinematic color grading and eye enhancement. Whether you shoot weddings, headshots, fashion, or social media content, there’s a set here for your workflow.
✦ What are Photoshop Actions?
Photoshop Actions are recorded sequences of editing steps that you can play back on any image with a single click. Instead of manually applying 20 adjustments every time, an action does it all automatically — saving you hours per shoot.
What to Look for in Portrait Retouching Actions
Not all Photoshop actions are created equal. Before you download the first freebie you find online, here are the key factors that separate professional-grade actions from ones that will ruin your images:
Non-Destructive Workflow
The best portrait retouching actions work on separate layers — never flattening your original image. This gives you full control to adjust intensity, mask specific areas, or undo any step after the action runs.
Skin Tone Compatibility
Great actions should look natural across all skin tones — from fair to deep. Avoid actions that over-soften dark skin, add unwanted orange tones, or blow out highlights on lighter complexions.
Speed and File Size
A good action should run in under 10 seconds on a modern computer. If an action is slowing Photoshop to a crawl, it’s either poorly coded or creating too many unnecessary layers.
Customizability
The action should be a starting point, not the final word. Look for actions that leave adjustment layers you can tweak — not merged, flattened results you’re stuck with.
Top 7 Photoshop Actions for Portrait Retouching 2026
01 ⭐ Editor’s Choice Best Overall
Professional Skin Retouching Action Bundle
This is the gold standard for portrait photographers who demand flawless skin without the plastic-looking over-smoothing. The bundle includes frequency separation, dodging & burning, skin softening, and highlight recovery — all in one package.
Each action runs non-destructively, creating labeled layer groups you can adjust individually. The skin softening algorithm is particularly impressive — it preserves pores and natural texture while removing blemishes and uneven tones.
Non-Destructive All Skin Tones PS 2021–2026
- Includes 12 individual actions covering every step of portrait retouching
- Works on both RAW and JPEG files
- Comes with video tutorial for beginners
- One-time purchase — no subscription required
02 Best for Weddings
Frequency Separation Action — Advanced Edition
Frequency separation is arguably the most powerful technique in portrait retouching, and this action automates the entire setup in under 3 seconds. It separates your image into texture and color layers, letting you retouch each independently.
Wedding photographers love this one because it handles mixed lighting beautifully — a common challenge at indoor wedding venues where warm tungsten and cool window light clash on the subject’s face.
16-bit Compatible Smart Objects
- Creates a labeled, organized layer structure automatically
- Includes Gaussian Blur and Surface Blur variations
- Preserves fine skin texture even at high magnification
- Compatible with Photoshop CC 2020 through 2026
03 Best for Instagram Viral Aesthetic
Cinematic Portrait Color Grading Actions
If your goal is a consistent, editorial aesthetic across your portrait portfolio — this is the set. These actions combine skin retouching with cinematic color grading, giving your portraits that moody, magazine-editorial look that dominates Instagram and Pinterest.
Includes 8 cinematic looks: Warm Film, Cool Matte, Faded Vintage, High Fashion, Golden Hour, Blue Steel, Soft Pastel, and Dark Drama — each fully adjustable with an opacity slider.
8 Cinematic Looks Opacity Control
- Combines skin retouching + color grading in one workflow
- Ideal for social media content creators and influencers
- Each look has a matching Lightroom preset included
- Works best on correctly exposed RAW or JPEG files
04 Best Free Option
Basic Portrait Cleanup Action (Free)
Not ready to invest in a full bundle? This free starter action covers the essentials: spot healing preparation, skin tone evening, basic sharpening, and a mild brightness boost — perfect for photographers just getting started with actions.
While it won’t replace a professional retouching workflow, it’s a solid introduction to what actions can do — and a great way to build confidence before upgrading to a premium set.
Free Download Beginner Friendly
- 5 basic actions: Clean, Tone, Sharpen, Soften, Brighten
- No layers knowledge required to use
- Good starting point for YouTube portrait tutorials
05 Best for Headshots
Professional Headshot Retouching Action Set
Corporate headshots have very specific requirements: clean, natural, professional — no heavy retouching that looks fake on a LinkedIn profile or company website. This set was built specifically for that client type.
It balances skin smoothing with sharpness, enhances eyes subtly without making them look unnatural, and applies a neutral color grade that works in both print and digital formats.
Print-Ready Output Natural Results
- Includes background cleanup action for studio shots
- Eye brightening and sharpening action included
- Teeth whitening action with precise control
- Perfect for corporate, LinkedIn, and actor headshots
✦ Pro Tip
Always run Photoshop actions on a duplicate layer (Ctrl+J / Cmd+J) before starting. This way, your original is always safe and you can compare before/after by toggling the duplicate layer’s visibility.
06 Best for Dark Skin
Inclusive Skin Retouching Actions — All Tones
One of the biggest complaints in the photography community is how most retouching tools are designed around fair skin tones, producing over-smoothed, grey-toned, or washed-out results on darker complexions. This set was specifically built to address that.
With separate calibrations for fair, medium, olive, brown, and deep skin tones, each action delivers natural-looking results that preserve the richness and warmth of every complexion.
5 Skin Tone Presets True-to-Life Results
- Separate action for each of 5 skin tone groups
- Preserves warm undertones on medium and dark skin
- No grey-skin or over-smoothing artifacts
- Loved by boudoir and fashion photographers
07 Best Value Bundle
Complete Portrait Workflow Bundle (All-in-One)
If you want to buy once and have everything you need — this is it. The Complete Portrait Workflow Bundle includes frequency separation, skin softening, dodging & burning, eye enhancement, color grading, sharpening, and exporting actions — the full professional retouching pipeline in one download.
It’s the bundle that working photographers use when they need to turn around 400 portraits from a shoot within 24 hours without sacrificing quality.
30+ Actions Full Workflow Best Value
- Covers every stage from import to export
- Includes Lightroom presets as a bonus
- Commercial license included — use on client work
- Priority email support from Camegraphy team
Quick Comparison Table
| Action Set | Best For | Non-Destructive | All Skin Tones | Includes LUTs | Price |
|---|---|---|---|---|---|
| Professional Skin Bundle | All portrait styles | ✓ | ✓ | ✗ | Premium |
| Frequency Separation | Wedding / Studio | ✓ | ✓ | ✗ | Mid-range |
| Cinematic Color Grading | Social media / Fashion | ✓ | ✓ | ✓ | Mid-range |
| Basic Cleanup | Beginners | ✗ | ✓ | ✗ | Free |
| Headshot Set | Corporate / LinkedIn | ✓ | ✓ | ✗ | Mid-range |
| Inclusive Skin Tones | Boudoir / Fashion | ✓ | ✓ | ✗ | Mid-range |
| Complete Bundle | Full workflow | ✓ | ✓ | ✓ | Best value |
How to Install & Use Photoshop Actions
Never used Photoshop actions before? Here’s the complete installation process — it takes less than 2 minutes.
Step 1: Download the Action File (.atn)
After purchasing from Camegraphy, download your .atn file (Photoshop Action format) to your computer. Extract it from the ZIP archive if necessary.
Step 2: Open the Actions Panel in Photoshop
Go to Window → Actions (or press Alt+F9 on Windows / Option+F9 on Mac). The Actions panel will open as a floating window or dock.
Step 3: Load the Action
Click the hamburger menu icon (four horizontal lines) in the top-right corner of the Actions panel. Select “Load Actions…” from the dropdown, then navigate to your downloaded .atn file and click Open.
Step 4: Run the Action
Open your portrait image in Photoshop. In the Actions panel, click on the action you want to apply, then press the Play button (triangle icon) at the bottom of the panel. The action will run automatically.
⚠ Important
Always duplicate your background layer before running any action (Ctrl+J / Cmd+J). Some actions may flatten or merge layers. Working on a duplicate protects your original file permanently.
Step 5: Adjust & Fine-Tune
After the action runs, review the layers it created in your Layers panel. You can reduce the opacity of any layer, add a layer mask to paint the effect away from specific areas, or adjust individual settings to taste. Good actions are designed to be customized.
Pro Tips for Better Portrait Retouching
1. Always Retouch at 100% Zoom
Skin retouching done at 50% zoom looks very different when you zoom to 100%. Train yourself to zoom in fully when evaluating skin texture — what looks smooth from a distance may still have uneven patches up close.
2. Use the Fade Command for Subtlety
After running a skin-softening action, go to Edit → Fade (immediately after the action plays) to reduce the effect’s intensity without changing the layer structure. This is one of the least-known but most powerful tricks in portrait editing.
3. Retouch the Eyes Separately
Eyes deserve their own dedicated treatment. Use a sharpening action specifically on the eye area, paint a dodge-and-burn layer around the iris, and subtly brighten the catchlights. The eyes carry the entire emotional impact of a portrait — they deserve the most attention.
4. Match Your Retouching to the Delivery Platform
A portrait going to a 40-inch print requires more careful skin retouching than one going to an Instagram square. Social media compresses images and displays them small — heavy retouching that looks natural on a small screen can look artificial on a large monitor.
5. Calibrate Your Monitor
None of these actions will look the way they’re intended if your monitor isn’t calibrated. A warm, yellowish monitor will make you over-cool your images. A cool, bluish monitor will make you over-warm them. Invest in a color calibration device — it’s the single most impactful hardware upgrade for any retoucher.
Frequently Asked Questions
Are Photoshop actions compatible with all versions of Photoshop?
Most professional actions work with Photoshop CC 2020 and newer. Some advanced actions that use Neural Filters or AI-powered tools require Photoshop 2022 or later. Always check the compatibility notes on the product page before purchasing. All actions on Camegraphy list their compatibility clearly.
Can I use Photoshop actions on RAW files?
Yes — but you need to convert your RAW file to a TIFF or JPEG layer first, or be working in Photoshop’s Camera Raw as a Smart Object. Most professional actions are designed to run on converted, editable layers rather than directly on RAW files still in Camera Raw.
Do Photoshop actions work on Photoshop Elements?
Some basic actions work on Photoshop Elements, but most professional retouching actions require the full Adobe Photoshop CC. Elements lacks several features like 16-bit layer support, advanced blending modes, and certain layer types that professional actions depend on.
How many actions can I have installed at once?
There’s no practical limit to how many actions you can install in Photoshop. However, for performance and organization, most professionals keep only the action sets they use regularly loaded — and archive others. You can load and unload action sets in seconds through the Actions panel menu.
Is frequency separation really necessary for portrait retouching?
For commercial and professional portrait work — yes. Frequency separation is the industry-standard technique because it lets you retouch skin tone and texture independently. Without it, smoothing skin tone also smooths texture, giving that telltale plastic-skin look. With frequency separation, you can have smooth, even skin tone while still retaining every natural pore and texture detail.
What’s the difference between Lightroom presets and Photoshop actions?
Lightroom presets adjust global settings like exposure, white balance, and color grading — they’re fast and great for consistent looks across many images. Photoshop actions, on the other hand, work on individual pixel layers and can perform complex, targeted retouching like skin smoothing, frequency separation, and local dodging & burning that Lightroom simply cannot do. For a complete workflow, most professionals use both: Lightroom for culling and color, Photoshop for retouching.
Ready to Transform Your Portrait Workflow?
Stop spending hours on manual retouching. Browse Camegraphy’s full collection of professional Photoshop actions — built for real photographers, tested on real shoots
.Browse All Photoshop Actions →
You Might Also Like
- Cinematic Color Grading in Lightroom — Step-by-Step Guide
- Best Lightroom Presets for Portrait Photography 2026
- How to Edit Photos Faster in Lightroom — Professional Workflow
- Free vs Paid Lightroom Presets: Which Should You Use?
Published by Camegraphy — Toronto, Canada. Professional photography resources for photographers who take their craft seriously.