


frozen or blurred. Together, they form what photographers call the Exposure Triangle — and mastering them means you’ll never have to rely on Auto mode again.
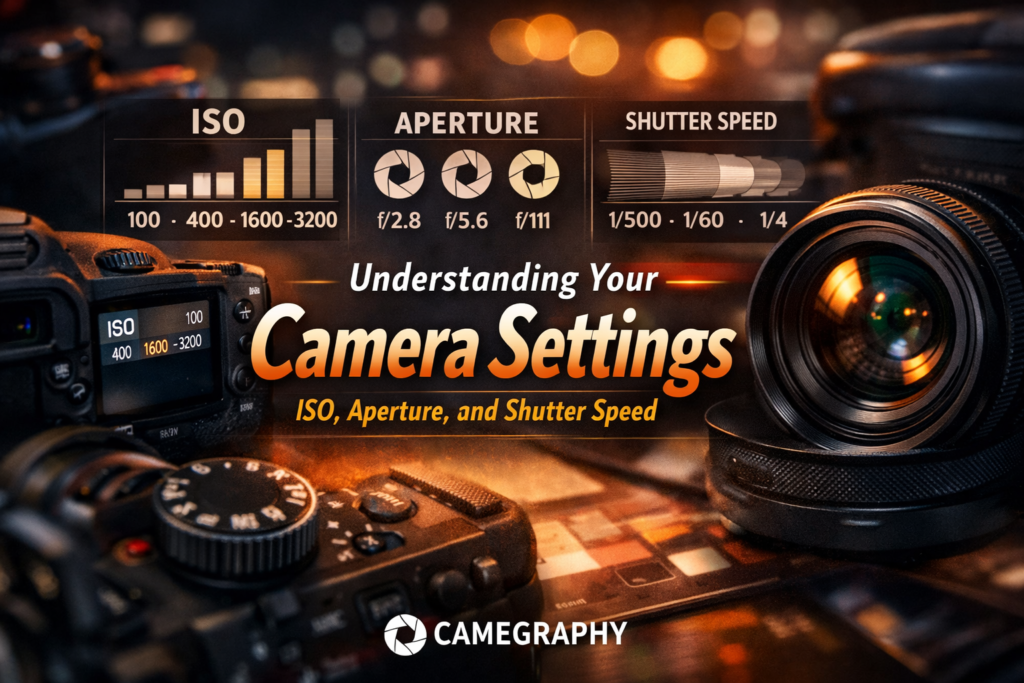
Camera settings ISO aperture shutter speed — these three terms are
the foundation of every great photo. Whether you’re just starting out
or trying to break free from Auto mode, understanding how ISO,
aperture, and shutter speed work together will transform your
photography forever.
In this complete guide, we’ll break down each camera setting in plain language, show you exactly when and how to use ISO, aperture, and shutter speed, and give you a practical cheat sheet you can use on your next shoot. Whether you’re shooting weddings, real estate, portraits, or social media content — this guide is for you.
Mastering camera settings ISO aperture shutter speed is what separates
photographers who get lucky shots from those who create them intentionally.
📋 Table of Contents
- What Is the Exposure Triangle?
- ISO Explained — Sensor Sensitivity
- Aperture Explained — Depth of Field & Light
- Shutter Speed Explained — Freeze or Blur Motion
- How ISO, Aperture & Shutter Speed Work Together
- Camera Shooting Modes — Which One to Use
- Quick Cheat Sheet by Shooting Scenario
- How to Practice Camera Settings as a Beginner
- Take Your Photos Further With Camegraphy
- Frequently Asked Questions
- Final Verdict
What Is the Exposure Triangle?
Before diving into each camera setting individually, it helps to understand how they fit together. The Exposure Triangle describes the relationship between ISO, aperture, and shutter speed — the three settings that determine the brightness (exposure) of every photo you take.
Think of it like filling a bucket with water. The aperture is how wide you open the faucet. The shutter speed is how long you leave it running. The ISO is how full the bucket appears. Change one, and you need to adjust at least one other to keep the same exposure. Get this balance right, and every photo you take will be properly exposed — not too bright, not too dark.
“Understanding camera settings ISO aperture shutter speed starts with learning each one individually…”
ISO
Controls your sensor’s sensitivity to light. Higher ISO = brighter image, but more digital noise (grain).
🎯
Aperture
Controls the size of the lens opening. Affects brightness AND depth of field — how much of your photo is in focus.
⚡
Shutter Speed
Controls how long the sensor is exposed to light. Freeze motion or create artistic blur — your choice.
🔆 ISO
ISO Explained — How Sensitive Is Your Camera to Light?
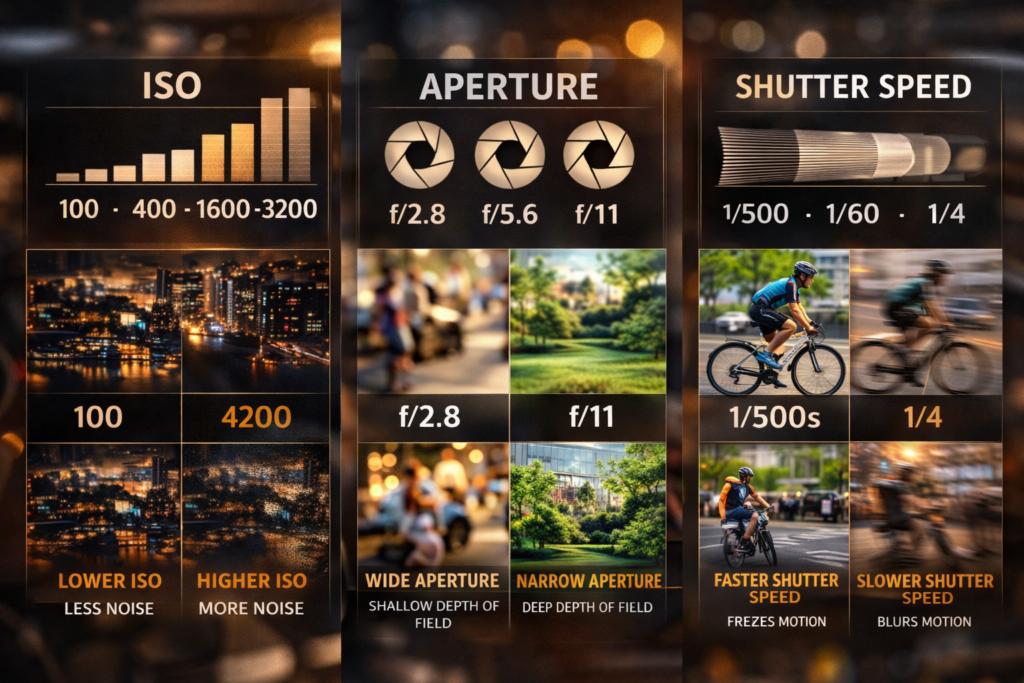
ISO is one of the three core camera settings and controls how sensitive your camera’s sensor is to available light. A low ISO means the sensor needs more light to produce a properly exposed image. A high ISO means the sensor is more sensitive — useful in dark conditions, but at the cost of introducing digital noise (grain) into your photo.
In plain terms: the higher the ISO number, the brighter the image — but the grainier it gets. Always use the lowest ISO that still gives you a properly exposed shot.
“The following table summarizes how each camera setting — ISO, aperture, and shutter speed — affects your image…”
| ISO Value | Best Used When | Image Quality |
|---|---|---|
| ISO 100 | Bright sunny day outdoors | Cleanest, no grain Best |
| ISO 200–400 | Overcast sky, open shade | Excellent, minimal grain Great |
| ISO 800–1600 | Indoor light, golden hour | Good, slight grain visible Good |
| ISO 3200–6400 | Dim rooms, evening events | Noticeable grain Acceptable |
| ISO 12800+ | Very dark / night photography | Heavy grain — use carefully Last Resort |
💡 Pro Tip
Modern mirrorless cameras like the Canon EOS R50 or Sony ZV-E10 II handle high ISO much better than older cameras. Don’t be afraid to push to ISO 3200 if you need to — a slightly grainy photo is always better than a blurry one from using a slow shutter speed in low light.
🎯 Aperture
Aperture Explained — Control Light and Depth of Field
Aperture is the opening inside your lens that lets light pass through to the sensor. It’s measured in f-stops (f/1.8, f/4, f/11, etc.) — and here’s the part that confuses beginners: a smaller f-number = a larger opening = more light.
But aperture does more than just control brightness. It also controls depth of field — how much of your scene appears sharp vs. blurred. This is the camera setting responsible for that beautiful blurred background (called bokeh) you see in professional portrait photos.
| Aperture (f-stop) | Opening Size | Depth of Field | Best For |
|---|---|---|---|
| f/1.4 – f/1.8 | Very wide | Very shallow — blurry BG Bokeh | Low light portraits |
| f/2 – f/2.8 | Wide | Shallow — subject pops Portraits | Portraits, events, weddings |
| f/4 – f/5.6 | Medium | Moderate depth of field Versatile | Group shots, street, travel |
| f/8 – f/11 | Narrow | Deep — most things sharp Landscapes | Landscapes, architecture |
| f/16 – f/22 | Very narrow | Everything in focus | Macro, product detail |
💡 Pro Tip
Most lenses produce their sharpest images 2–3 stops down from wide open. If your lens has a maximum aperture of f/1.8, try shooting at f/2.8 or f/4 for the sharpest results — especially for product and real estate photography.
⚡ Shutter Speed
Shutter Speed Explained — Freeze Motion or Create Blur
Shutter speed controls how long your camera’s shutter stays open when you take a photo. It’s measured in fractions of a second (1/500, 1/60) or full seconds (1″, 5″). A fast shutter speed freezes motion — great for sports and wildlife. A slow shutter speed blurs motion — perfect for waterfalls, light trails, and creative long exposure shots.
Shutter speed also affects brightness: a slower speed lets in more light, while a faster speed lets in less. Mastering this camera setting gives you dramatic creative control.
| Shutter Speed | Effect on Motion | Best Used For |
|---|---|---|
| 1/2000s – 1/4000s | Freezes fast action completely Freeze | Sports, birds in flight, cars |
| 1/500s – 1/1000s | Freezes most motion Sharp | Running subjects, kids playing |
| 1/250s | Freezes walking motion | Street, casual portraits |
| 1/60s – 1/125s | Sharp for stationary subjects | Portraits, indoor events |
| 1/30s or slower | Motion blur begins Blur | Creative blur — use a tripod! |
| 1s – 30s+ | Heavy blur / light trails Long Exposure | Waterfalls, night sky, traffic |
💡 Pro Tip
The Reciprocal Rule: To avoid camera shake when handholding, your shutter speed should be at least 1 divided by your focal length. Shooting with a 50mm lens? Use at least 1/50s. With a 200mm telephoto? Use at least 1/200s. With image stabilization (IBIS), you can go 2–4 stops slower.
How ISO, Aperture & Shutter Speed Work Together
Change one setting and you must compensate with the others. Here’s how they interact in real shooting scenarios:
🌞 Bright Outdoor Day
- ISO: 100
- Aperture: f/8
- Shutter: 1/500s
🎭 Indoor Portrait
- ISO: 800
- Aperture: f/2.0
- Shutter: 1/125s
⚽ Sports / Action
- ISO: 800–1600
- Aperture: f/4
- Shutter: 1/1000s+
🌊 Waterfall / Long Exposure
- ISO: 100
- Aperture: f/11
- Shutter: 1s – 10s
🌃 Night / Low Light
- ISO: 3200–6400
- Aperture: f/1.8
- Shutter: 1/60s
🏠 Real Estate Interior
- ISO: 400–800
- Aperture: f/8
- Shutter: 1/60s (tripod)
Camera Shooting Modes — Which One Should You Use?
Your camera settings only make sense in the right shooting mode. Understanding these modes helps you control ISO, aperture, and shutter speed at the right time.
| Mode | What You Control | Camera Controls | Best For |
|---|---|---|---|
| Auto | Nothing | Everything | Point-and-shoot moments only |
| Program (P) | ISO + Exposure Compensation | Aperture + Shutter Speed | Street & casual photography |
| Aperture Priority (Av) | Aperture + ISO | Shutter Speed | Portraits, landscapes — depth of field control |
| Shutter Priority (Tv) | Shutter Speed + ISO | Aperture | Sports, action, motion control |
| Manual (M) | All 3 settings | Nothing | Studio, real estate, full creative control |
💡 Recommendation
Start with Aperture Priority (Av). Set your aperture and ISO, and let the camera pick the shutter speed. This gives you creative control over depth of field while the camera handles exposure — the perfect middle ground for beginners learning their camera settings.
Once you understand camera settings ISO aperture shutter speed individually,
the next step is knowing which shooting mode to use.
📋 Camera Settings Cheat Sheet — By Shooting Scenario
💍 Wedding Ceremony
- ISO: 800–1600
- Aperture: f/2.0–f/2.8
- Shutter: 1/200s+
- Mode: Manual or Av
🏠 Real Estate Interior
- ISO: 400–800
- Aperture: f/8
- Shutter: 1/60s (tripod)
- Mode: Manual
👤 Outdoor Portrait
- ISO: 100–200
- Aperture: f/1.8–f/2.8
- Shutter: 1/500s
- Mode: Av or Manual
🌅 Landscape / Golden Hour
- ISO: 100
- Aperture: f/8–f/11
- Shutter: 1/250s
- Mode: Av or Manual
🎬 Social Media Reels
- ISO: Auto (max 3200)
- Aperture: f/2.8
- Shutter: 1/50s (180° rule)
- Mode: Manual Video
🌃 Night Photography
- ISO: 1600–6400
- Aperture: f/1.8–f/2.8
- Shutter: 1/60s or slower
- Mode: Manual + Tripod
How to Practice Camera Settings as a Beginner
Understanding camera settings in theory is one thing — applying them on a real shoot is where the real learning happens. Here’s a simple practice routine that will help you master ISO, aperture, and shutter speed faster than any course:
- Start in Aperture Priority (Av) Mode Set your ISO to Auto and choose an aperture. Shoot the same subject at f/1.8, f/4, and f/11 and compare the depth of field. Notice how the background changes — this is the power of the aperture camera setting in action.
- Practice Freezing and Blurring Motion Switch to Shutter Priority (Tv) mode. Ask someone to walk past you and shoot at 1/60s, 1/250s, and 1/1000s. Watch how motion changes with each shutter speed setting. This exercise alone will change how you think about photography.
- Learn ISO in Low Light Shoot the same indoor scene at ISO 100, 800, 3200, and 6400. Zoom into 100% on your screen after each shot and compare the grain levels. You’ll quickly learn the highest ISO your camera handles cleanly.
- Try Full Manual Mode Pick one scenario from the cheat sheet above. Set all three camera settings manually. Use your camera’s light meter (the bar in your viewfinder) to hit zero — that’s proper exposure. Adjust, shoot, review, repeat.
- Shoot RAW + Edit in Lightroom RAW files give you far more flexibility to fix exposure mistakes in post. Combine your new camera settings knowledge with professional Lightroom presets to create consistent, polished results every time.
🔗 Level Up Your Photography With Camegraphy
Once you master your camera settings, the right editing tools make all the difference:
- Professional Lightroom Preset Packs — One-click looks designed for weddings, real estate, portraits & more
- Photoshop Actions for Photographers — Batch edit entire shoots in seconds
- Best Camera for Beginners 2026 — Find the right camera body for your style
- How to Sell Photos Online in 2026 — Turn your photography skills into income
Frequently Asked Questions — Camera Settings: ISO, Aperture & Shutter Speed
❓ What are the three main camera settings?
The three main camera settings are ISO, Aperture, and Shutter Speed. Together they form the Exposure Triangle and control how bright your photo is, how much of the scene is in focus, and how motion appears in your images. Mastering these three settings gives you full creative control over your photography.
❓ What ISO should a beginner use?
Beginners should start with ISO 100 in bright daylight, ISO 400–800 in shade or indoor light, and ISO 1600–3200 in low light or at night. As a rule, always use the lowest ISO that still gives you a properly exposed shot — this keeps digital noise (grain) to a minimum.
❓ What aperture is best for portraits?
For portraits, use a wide aperture between f/1.8 and f/2.8. This creates a beautifully blurred background (bokeh) that makes your subject stand out. For group portraits where you need multiple people in focus, use f/4 to f/5.6 instead.
❓ What shutter speed do I use to freeze motion?
To freeze motion, use a fast shutter speed of at least 1/500s. For sports, fast-moving children, or wildlife, use 1/1000s or faster. For walking subjects, 1/250s is usually enough. Use slow shutter speeds (1/30s or slower) with a tripod if you want to intentionally blur motion.
❓ What is the exposure triangle in photography?
The exposure triangle is the relationship between the three main camera settings: ISO, aperture, and shutter speed. Changing one setting affects the others. For example, using a fast shutter speed (which lets in less light) means you need to either widen your aperture or raise your ISO to maintain the correct exposure.
❓ Should I shoot in Manual mode as a beginner?
Not necessarily right away. Start with Aperture Priority (Av) mode, which lets you control aperture and ISO while the camera sets the shutter speed. Once you’re comfortable with how ISO, aperture, and shutter speed interact, move to Manual mode for full creative control.
🏁 Final Verdict — Master Your Camera Settings in 2026
Learning your camera settings — ISO, aperture, and shutter speed — is the foundation of all great photography. Here’s your quick action plan:
- ISO: Start low (100–200 outdoors), go higher only when needed in low light
- Aperture: Use f/1.8–f/2.8 for portraits with blur; f/8–f/11 for landscapes
- Shutter Speed: 1/500s+ to freeze motion; 1/30s or slower for creative blur
- Start with Aperture Priority: The best beginner mode to learn camera settings fast
- Shoot RAW: Gives you maximum flexibility to fix exposure in Lightroom
- Practice daily: Pick one setting to experiment with every time you go out to shoot
The moment your camera settings stop feeling like math and start feeling like instinct — that’s when your photography transforms. Keep shooting, keep experimenting, and enjoy the journey. 📷
For a deeper technical reference on the exposure triangle, visit Exposure Triangle Basics .